
How to Use Netcat in linux
- theblackthreat

- Oct 20, 2021
- 2 min read
Updated: Oct 28, 2021
Netcat is one of the powerful networking tools, security tools,s or network monitoring tools. It acts like a cat command over a network. It is even considered as a Swiss army knife of networking tools. It is generally used for the following reasons:
Operation related to TCP, UDP, or UNIX-domain sockets
Port Scanning
Port listening
Port redirection
open Remote connections
Read/Write data across the network
Network debugging
Network daemon testing
Simple TCP proxies
A Socks or HTTP Proxy Command for ssh
Installing Netcat(NC) Process Monitoring Toolz
To install the Netcat tool use the following commands as per your Linux distribution.
$sudo apt-get install netcatWorking with netcat Security Tool
1. To start listening on a port, first Open 2 terminal windows.
$nc -l -p 1234Terminal 2 sending request
$nc 127.0.0.1 1234Note: Here the port number is 1234 and by default host is localhost.
Working with netcat Security Tool
1. To start listening on a port, first Open 2 terminal windows.
Terminal 1 for listening
$nc -l -p 1234
Terminal 2 sending request
$nc 127.0.0.1 1234
Note: Here the port number is 1234 and by default host is localhost.
It will not display anything but will start listening to port 1234 at the localhost from terminal 1. And anything entered in terminal 2 will be reflected back in terminal 1 as well which confirms that the connection is established successfully.
2. To transfer data. Open 2 terminal windows.
Terminal 1 for listening
$nc -l -p 1234 >output.txt
Terminal 2 for sending request
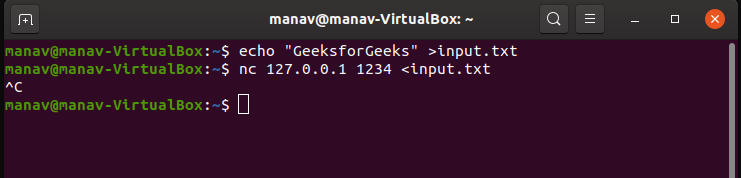
$echo "GeeksforGeeks" >input.txt
$nc 127.0.0.1 1234 <input.txt
Note: Here the port number is 1234 and by default host is localhost. It will send the input.txt file’s data from terminal 2 to the output.txt file at terminal 1.z

It will not display anything but will start listening to port 1234 at the localhost from terminal 1. And anything entered in terminal 2 will be reflected back in terminal 1 as well which confirms that the connection is established successfully.
2. To transfer data. Open 2 terminal windows.
Terminal 1 for listening
$nc -l -p 1234 >output.txtTerminal 2 for sending a request
$echo "GeeksforGeeks" >input.txt
$nc 127.0.0.1 1234 <input.txt
Note: Here the port number is 1234 and by default host is localhost. It will send the input.txt file’s data from terminal 2 to the output.txt file at terminal 1.

3. To perform Port Scanning. Enter the following command on the terminal.
Scanning a single port
$netcat -z -v 127.0.0.1 1234Scanning multiple ports
$nc -z -v 127.0.0.1 1234 1235Scanning a range of ports
$nc -z -v 127.0.0.1 1233-1240Note: Here the port numbers are 1234, 1235, 1233, and 1240 you may change them as per your need. It will display the port number with the status(open or not).

4. To send an HTTP Request
$printf “GET /nc.1 HTTPs/1.1\r\nHost: www.geeksforgeeks.org\r\n\r\n” | nc www.geeksforgeeks.org 80
5. To delay the interval for lines sent. Open 2 terminal as shown below:
Terminal 1 for listening
$nc -l -p 1234
Terminal 2 sending request
$nc -i 5 127.0.0.1 1234
Note: Here the port number is 1234 and by default host is localhost. The time taken is 5 seconds. Each will be sent after 5 seconds of time.


Comments